Tech Tip Tuesday: Google Drawings
Introduction to Google Drawings
This week let's take a look at the forgotten stepchild of Google Workspace: Google Drawings. It is simple to use and pretty powerful. No, it's not for illustrations, but it's great for what it can do. Here's how to get started.
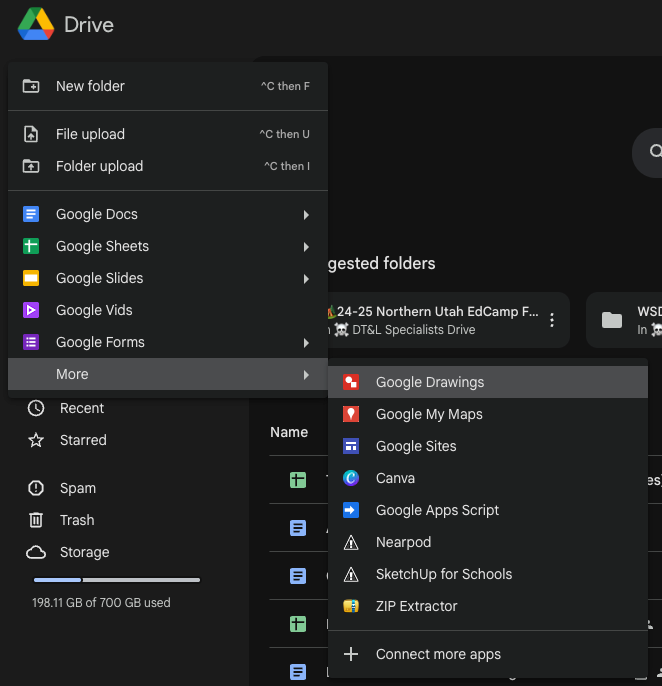
How to access Google Drawings
Google Drive>New>More>Google Drawings
What Can Google Drawings Do?
Google Drawings is a free, web-based tool that allows users to create diagrams, flowcharts, mind maps, graphic organizers, and simple illustrations. It’s part of Google Drive, making it easy to collaborate, share, and integrate with other Google Workspace apps like Docs, Slides, and Classroom.
Key Features:
✅ Create and Edit Graphics – Users can design shapes, insert images, and format text to create digital posters, infographics, and charts.
✅ Drag-and-Drop Functionality – Simple click-and-drag tools make it easy to move, resize, and align objects.
✅ Collaborative in Real Time – Like other Google apps, multiple users can edit a drawing simultaneously, leave comments, and track changes
✅ Insert from Google Drive or Web – Users can add images from Drive, Google Search, or even webcam snapshots.
✅ Hyperlinking and Interactive Elements – Great for making interactive diagrams where clicking on objects leads to external sources or other parts of a document.
✅ Export Options – Save work as PNG, JPG, PDF, or SVG for use in other applications.
✅ Integration with Google Apps – Easily insert Drawings into Google Docs, Slides, or Forms to enhance visual presentations.
Classroom Applications:
🎨 Graphic Organizers – Venn diagrams, T-charts, flowcharts for brainstorming or analyzing texts.
🖼 Digital Posters & Infographics – Perfect for showcasing research or visual storytelling.
📍 Math Manipulatives – Create number lines, fraction bars, or coordinate planes for interactive math activities.
📝 Annotate Images & Diagrams – Label parts of a plant, historical maps, or scientific processes.
💬 Storyboard Creation – Plan out stories, comic strips, or presentations with visuals and captions.
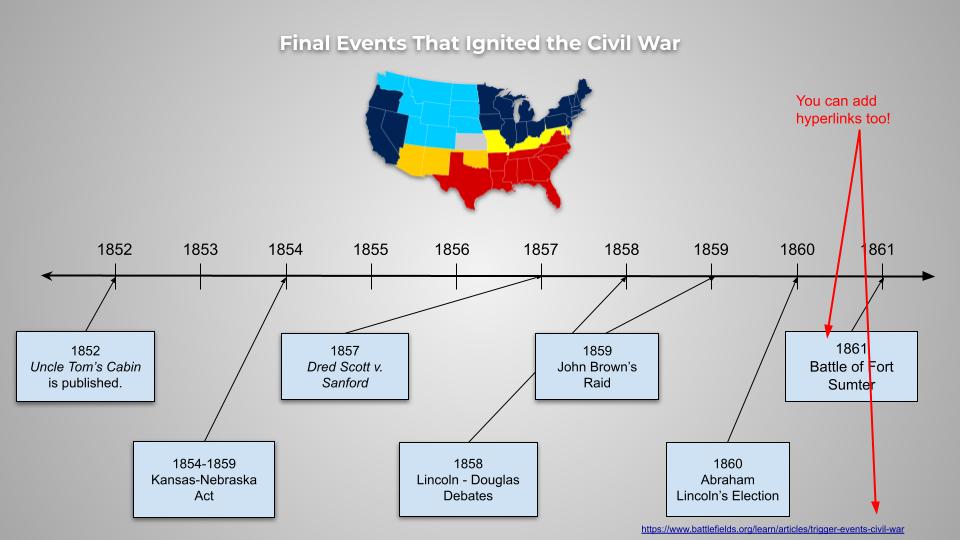
⌚Timelines! - Easily create timeline or story maps. Let’s look at how to do that now.
Creating a Timeline in Google Drawings
Create a new Google Drawing using the directions under How to Access Google Drawings shown above.
Name your document.
Right click and select Background to choose your background color or gradient. Remember, you can also add an image as the background. Add your image, select it, and choose Arrange>Order>Send to Back. Your background will only be locked in place if you add it as a background by right clicking and selecting Background, however.
Add images by selecting Insert>Image. You can upload images or search the web to add them.
Use the Arrow tool to draw your timeline.
Add demarcations for years using the line tool.
After the year marks are added, use the Select tool to select one mark, hold the shift key as you select all the others.
Now get them lined up by using the Arrange menu and selecting Align>Middle and then Align>Distribute>Horizontal.
Add your information by selecting Insert>Shape and selecting the shape of your choice. Draw the shape.
Double click the shape to add text.
Select the Arrow tool and connect your shape to the timeline or another shape by starting your arrow on a purple handle mark on the shape you drew.
Draw as many shapes as needed and connect them using the arrow tool as needed.